Secure file cabinet on my Mac
3 min read Feb 15, 2018
Here is the quick and easy way I store my important files on my Mac only using tools already installed every Mac.
In a nutshell, we are going to create a password encrypted vault, or as Apple calls it, a disk image. This vault will act like any other file that we can put on Dropbox or on a flash drive. However, with the password, you will be able to decrypt and open it up to drag files in and out as you see fit. Then, once you eject it, it will go back to its safe, encrypted state with all of the files inside completely inaccessible to anyone without a password.
Step 1: open up disk utility
The easiest way to open up Disk Utility is to use Spotlight (the little magnifying glass in your menu bar) to search for it.
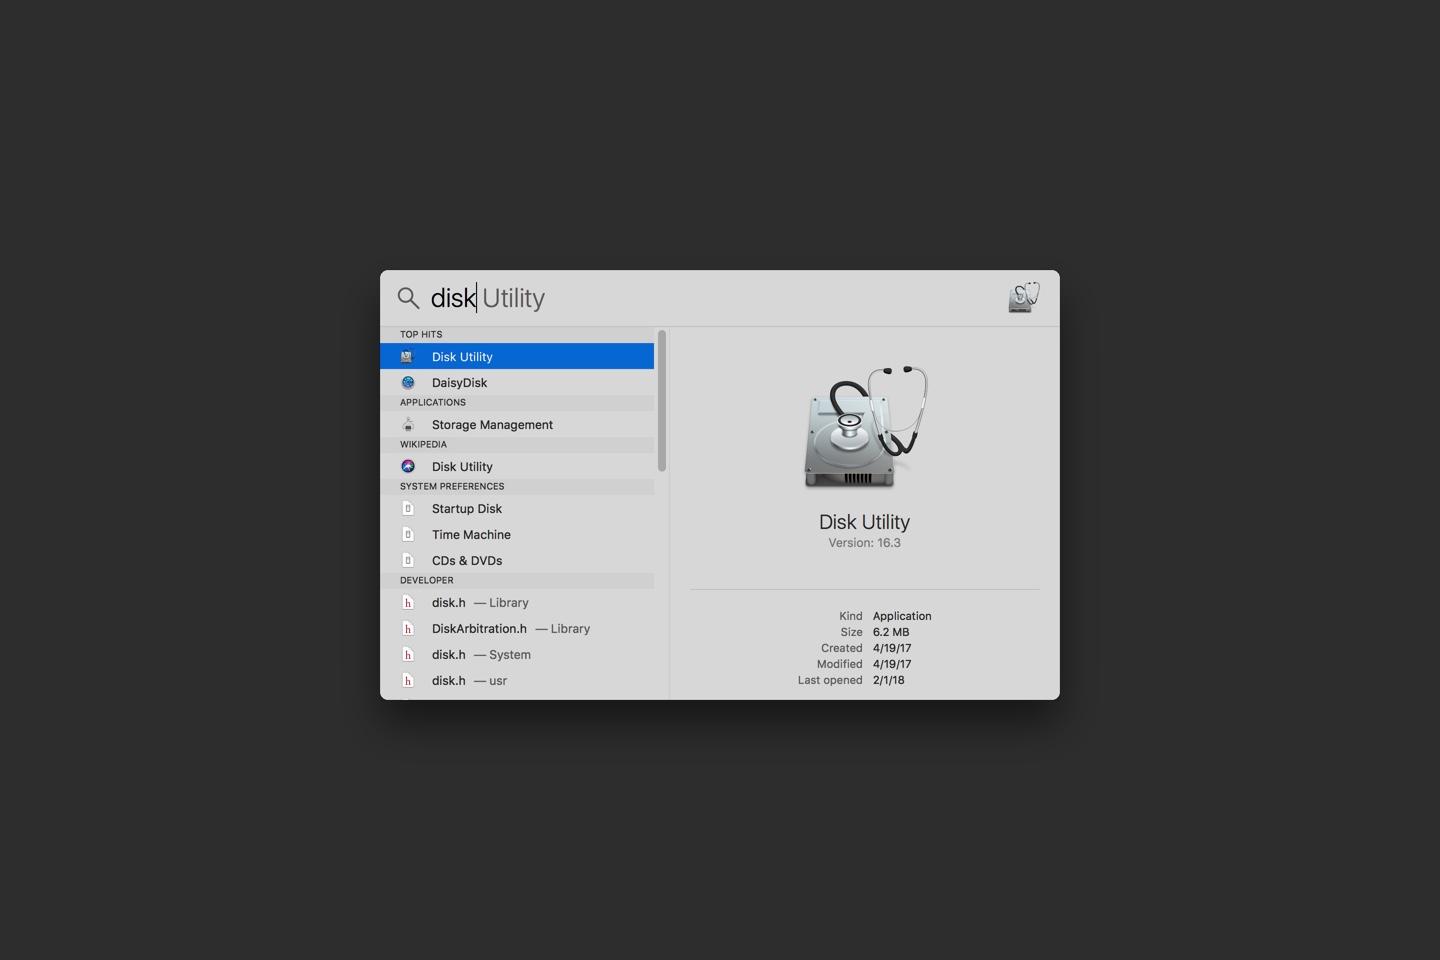
It can also be found at Applications > Utilities > Disk Utility.
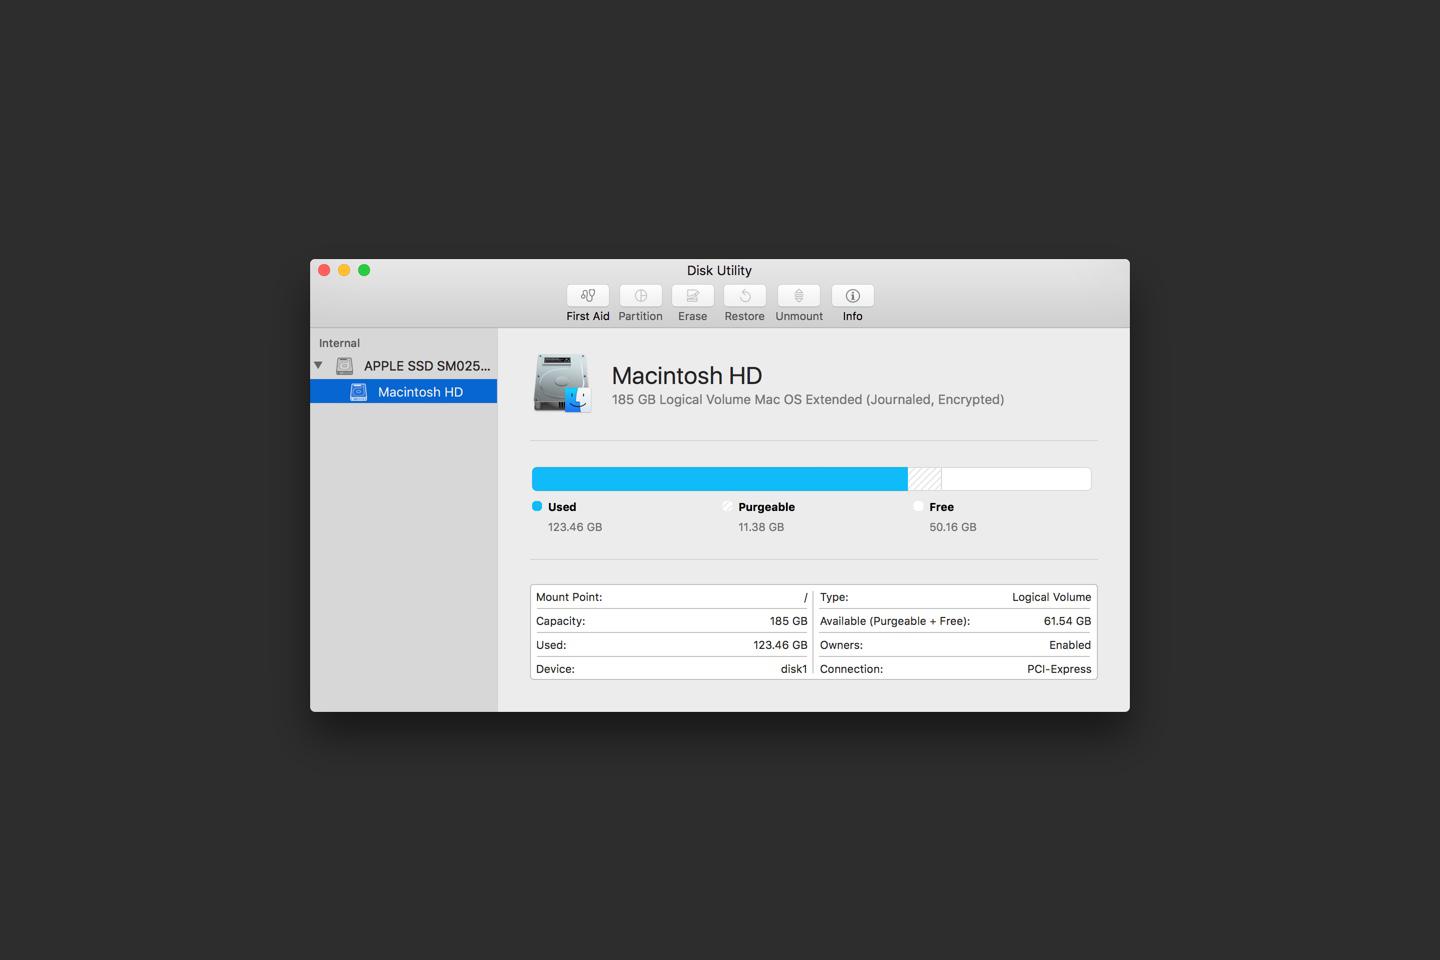
Disk Utility should open up to a window like what you see below.
Step 2: create your vault
You’ll need to create a new image. You can do this by using the
⌘ + N shortcut or by clicking
File > New Image > Blank Image… You
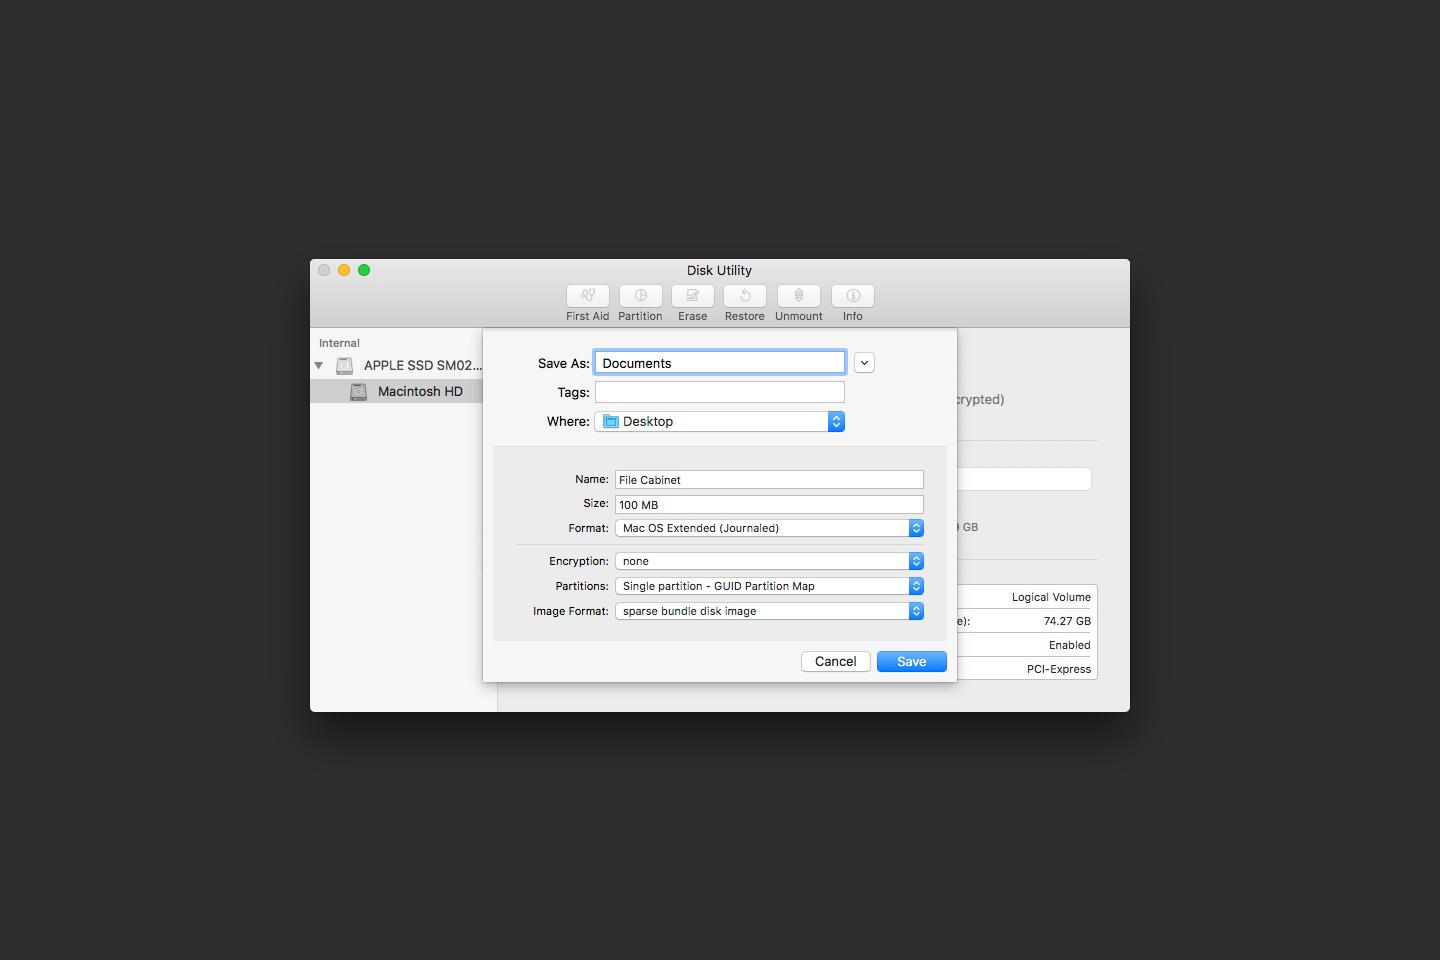
should see a screen like below.
-
Choose what you want your vault to be called and enter that next to “Save As”. In my case, I’ve called it “Documents”.
-
Choose where you want your vault to be saved to next to “Where”. I’m saving it to the Desktop in this example.
-
Then, next to “Name”, enter what you want your vault to show up as when you have entered the password and unlocked it. Ideally call this something different. I’m calling it “File Cabinet”.
-
At the bottom, choose “sparse bundle disk image”, for Image Format. This type of disk image will automatically resize itself as you add more and more files and is better if you will sync it using Dropbox or something similar.
-
Lastly, select “256-bit AES encryption” for “Encryption”. This will open a screen like seen below. Choose a password for your vault. Remember that if you forget it, you will lose access to all your files.
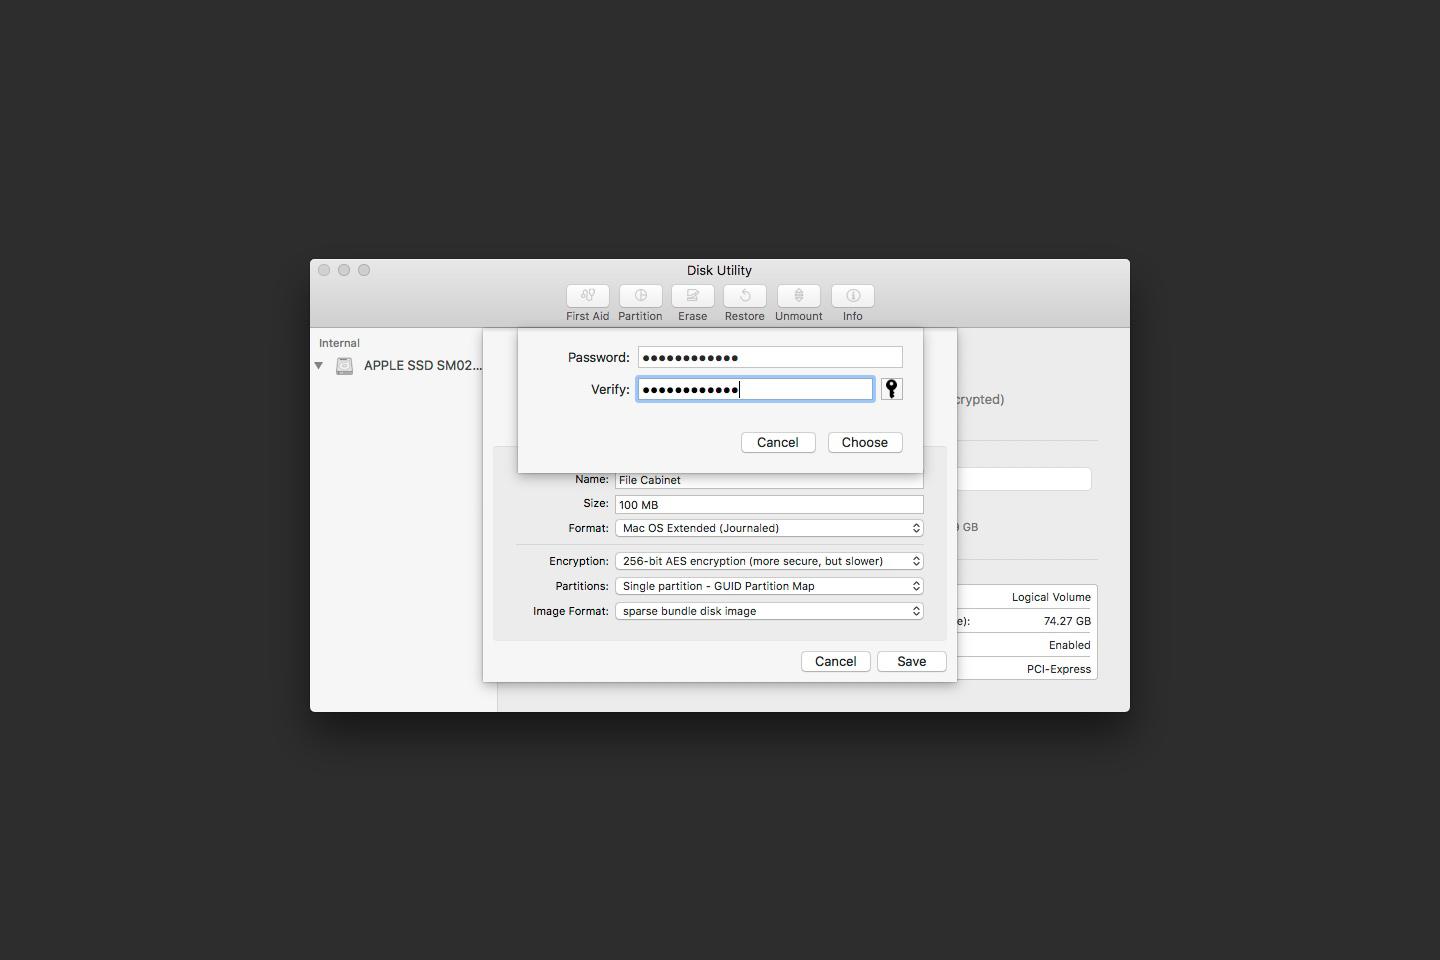
Click “Choose” and “Save” to finish creating your vault.
Step 3: start dragging your files in!
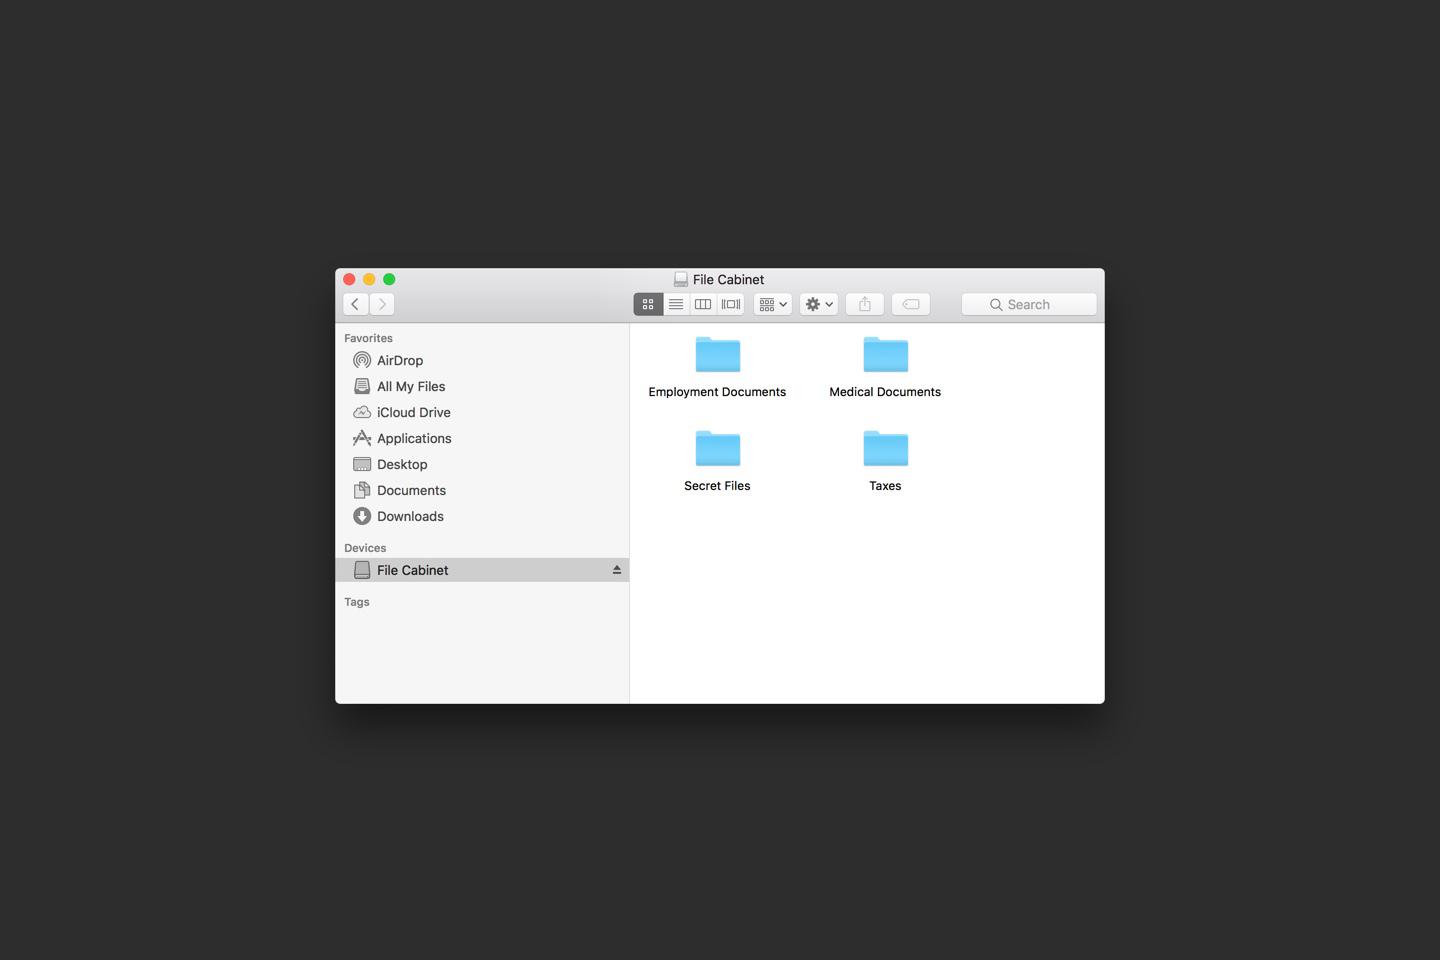
If you open up a new Finder window, you should see your sparsebundle file where you saved it. That’s your vault file.
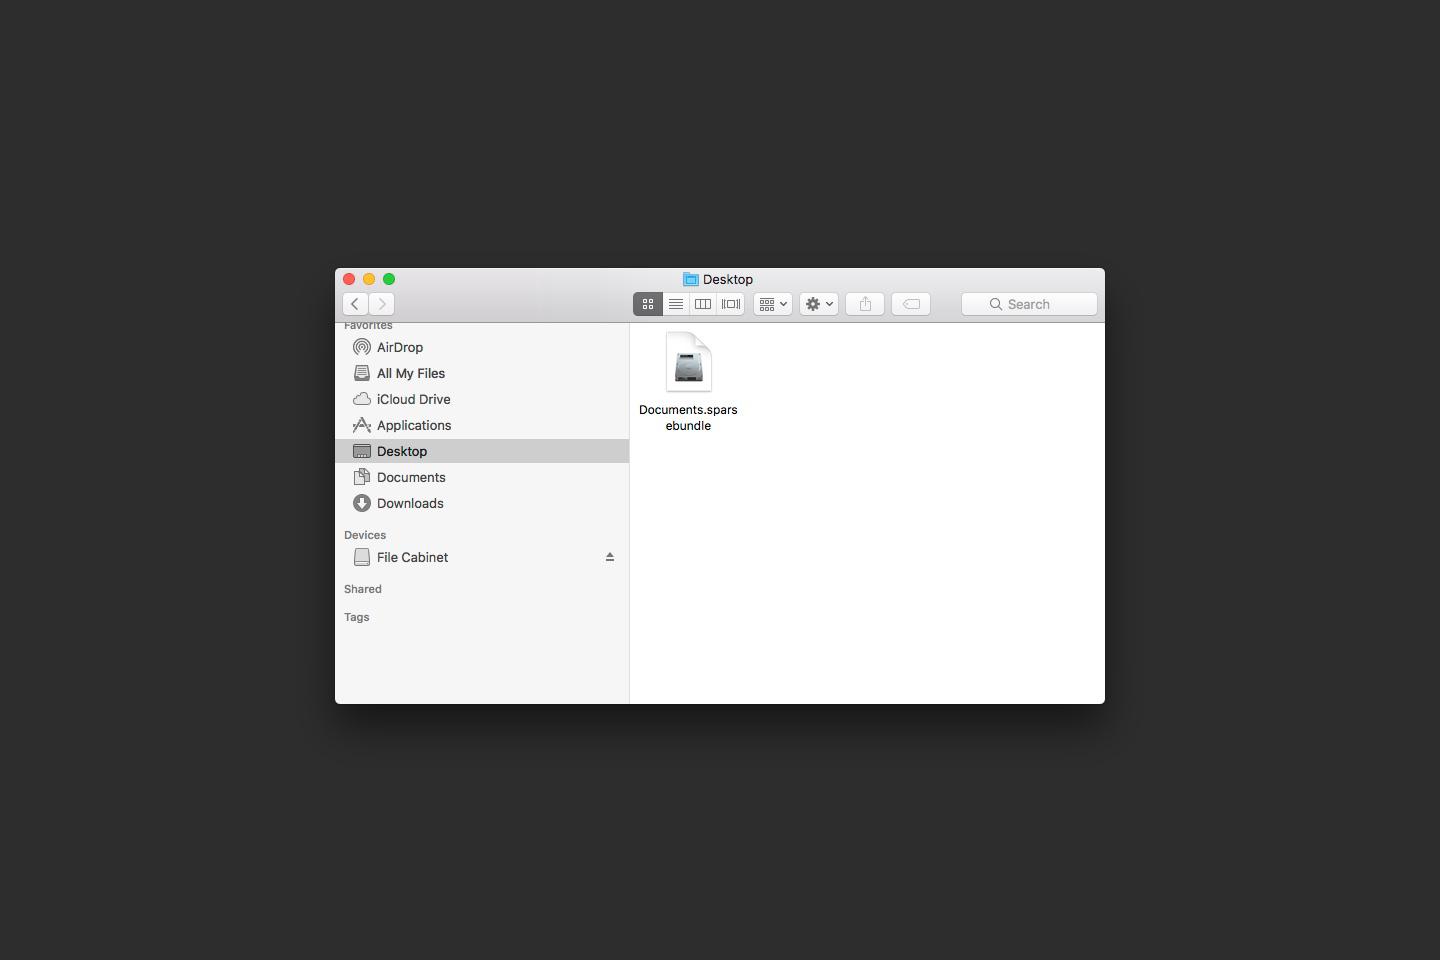
Also, in the sidebar under “Devices”, you should see your mounted image. Click that to see your unlocked vault all ready to drop files in. Just make sure that you eject it once you are done. That will encrypt and lock it.
