How I built a modular bookcase
6 min read Dec 14, 2017
Introduction
Over a year ago, I watched Ben Uyeda’s video about building a bookcase using only plywood and right angle shelf brackets. This idea immediately inspired me and started rattling around in my subconscious for months.
As I’ve been putting together my home office, I decided that I needed a bookcase. Instead of buying something from IKEA or second hand from craigslist, I decided to make my own based on Ben’s design. I didn’t like the aesthetics of the common shelf bracket that Ben used, so instead I designed my shelf around the cheaper and more minimal IKEA EKBY STÖDIS bracket. I also wanted to maximize use of a single sheet of plywood to build a larger shelf.
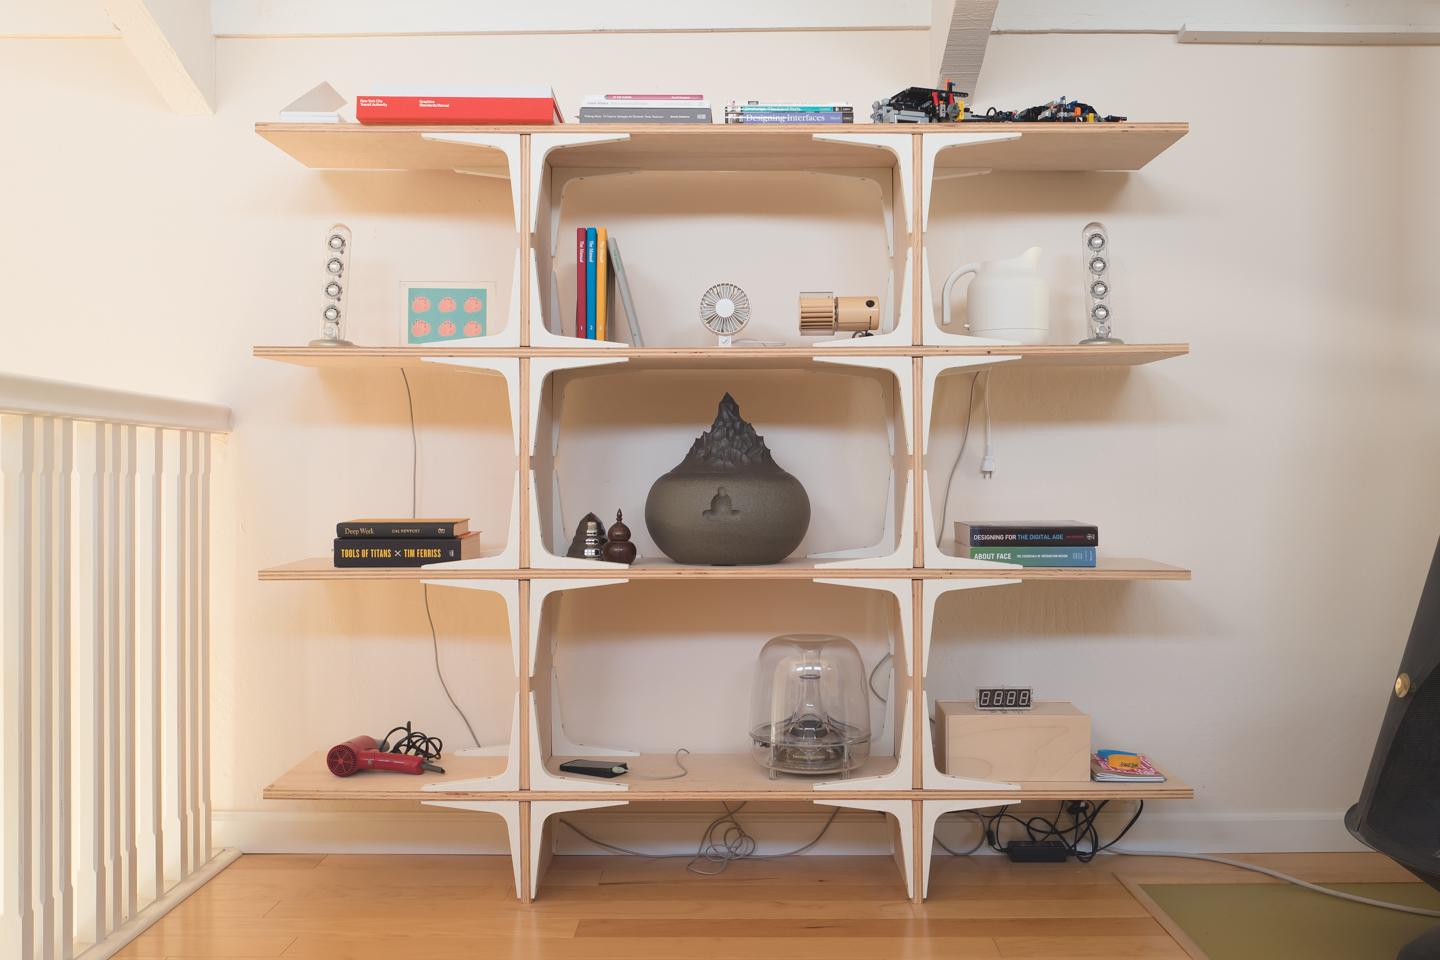
Given those constraints and the size of the space, I started drawing up plans for the bookcase. After many iterations on paper, I bought all my materials and built what you see below.
Read on for instructions on how to build your own.
Materials & tools
Materials
- 1 sheet (8 ft X 4 ft) ¾ inch plywood (I used A1 birch)
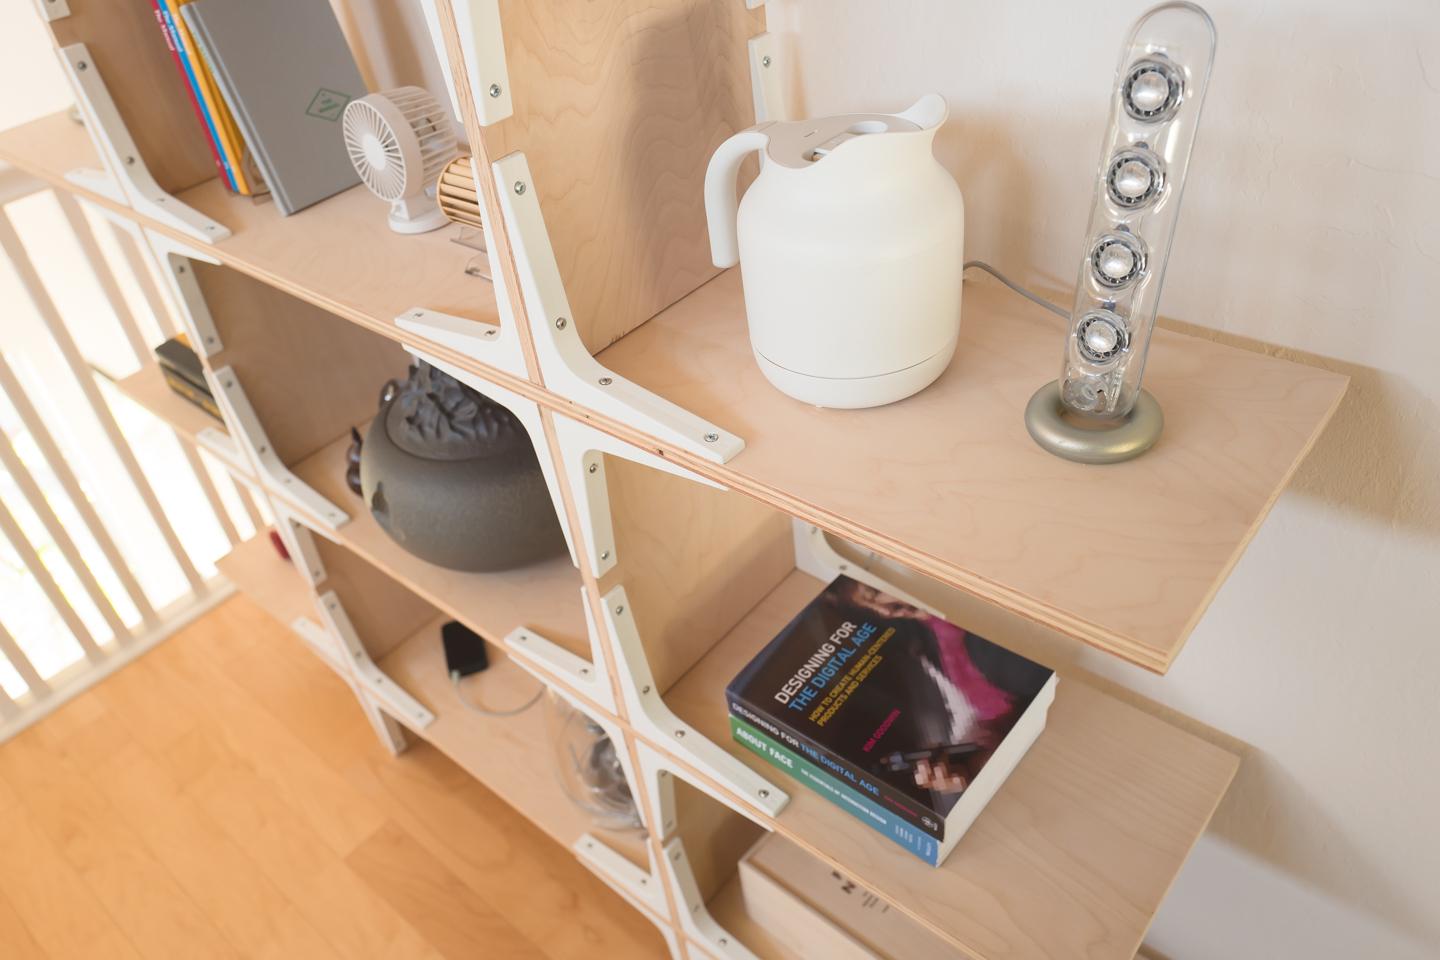
- **56 ** IKEA EKBY STÖDIS shelf brackets
- 112 #8 x 1 inch pan head phillips sheet metal screws
- 112 #8 x ⅝ inch pan head phillips sheet metal screws
The EKBY STÖDIS shelf brackets from IKEA are available in white, red and black. I chose white to go with my untreated wood, but I think either of the colors would do. One especially beautiful combination is black brackets with a dark stain on the plywood.
Be careful with the types of screws you buy. It’s important that they aren’t self tapping screws because they won’t have many threads to lock into the wood with. Also, the lengths of the screws are important as longer screws will collide with each other.
Tools
- tape measure for measuring the room and larger sections of wood
- pencil for marking measurements
- powered drill for driving screws
- circular saw (optional) for cutting wood into final sizes
- speed square (optional) helps when cutting with a circular saw
- framing square (optional) for easily measuring smaller lengths of wood to cut
- clamps (optional) for holding together pieces when assembling
Assembly
Step 1: acquire wood and make first cuts
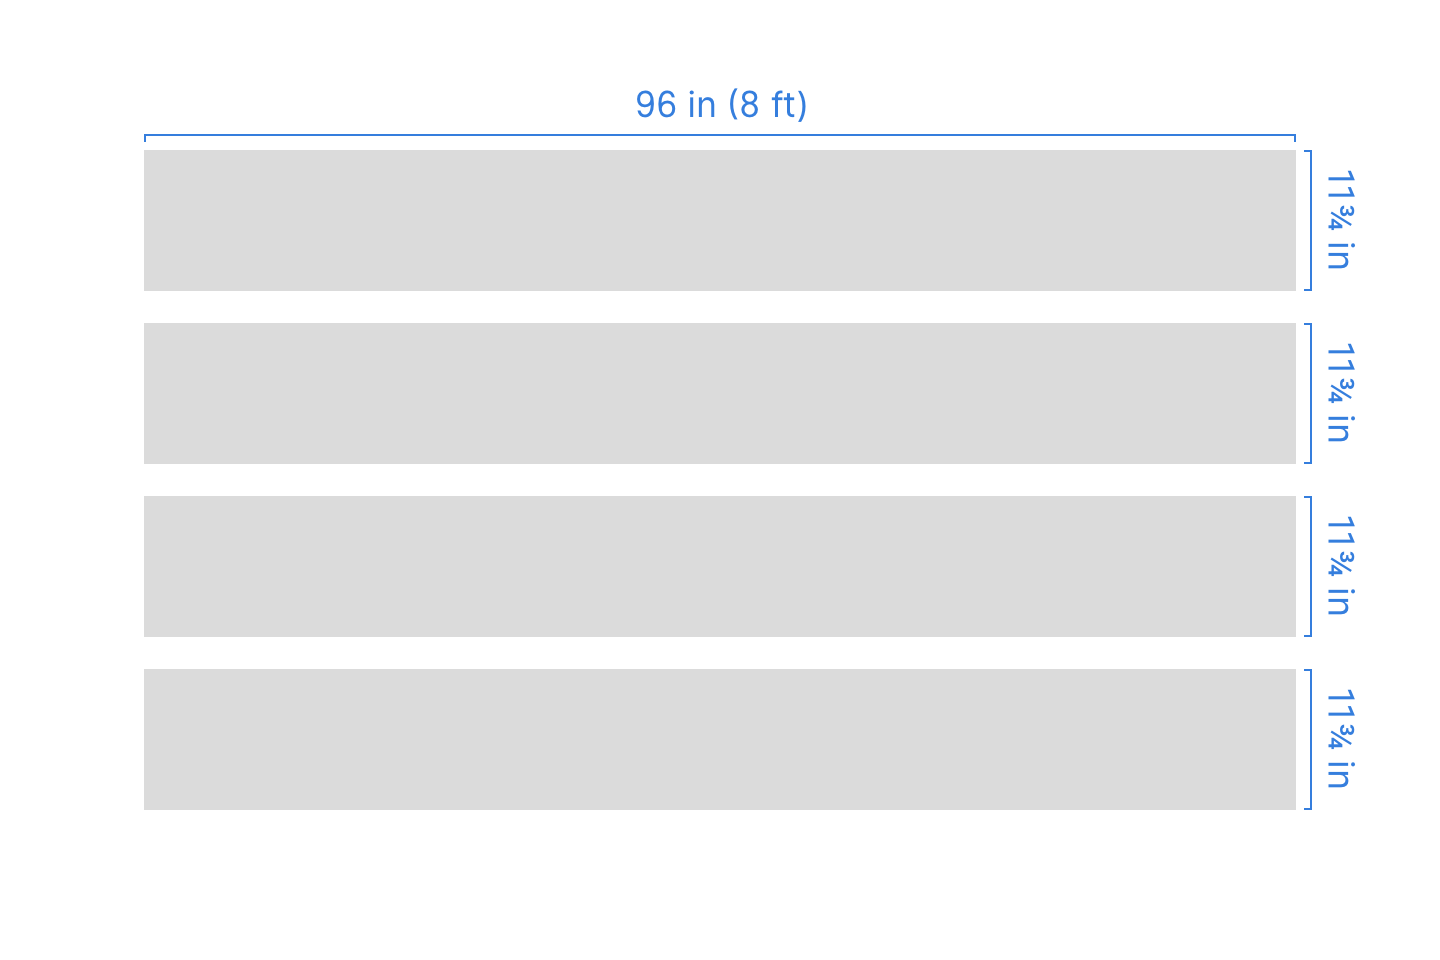
The first and most important step is acquiring a sheet of ¾ inch plywood and having it cut into 4 equal strips.
In the US, the standard size for plywood is 8 feet by 4 feet and is sold in different thicknesses like ½ inch and ¾ inch. Note that the actual thickness will be different than quoted. It’s not important in the construction of this bookcase, but it’s worth keeping in mind for other projects.
While you can have wood cut for free at Home Depot or Lowes, I would recommend visiting a lumberyard because they’ll not only advise you on the type of wood to buy, but will make higher quality cuts. In my experience, employees at home improvements stores are overworked and inexperienced with wood in comparison to their counterparts at lumberyards.
Luckily for me, I live very close to a fantastic lumberyard, Pine Cone Lumber. I went over one day to chat with them about the different types of plywood I could use and anything else I should keep in mind.
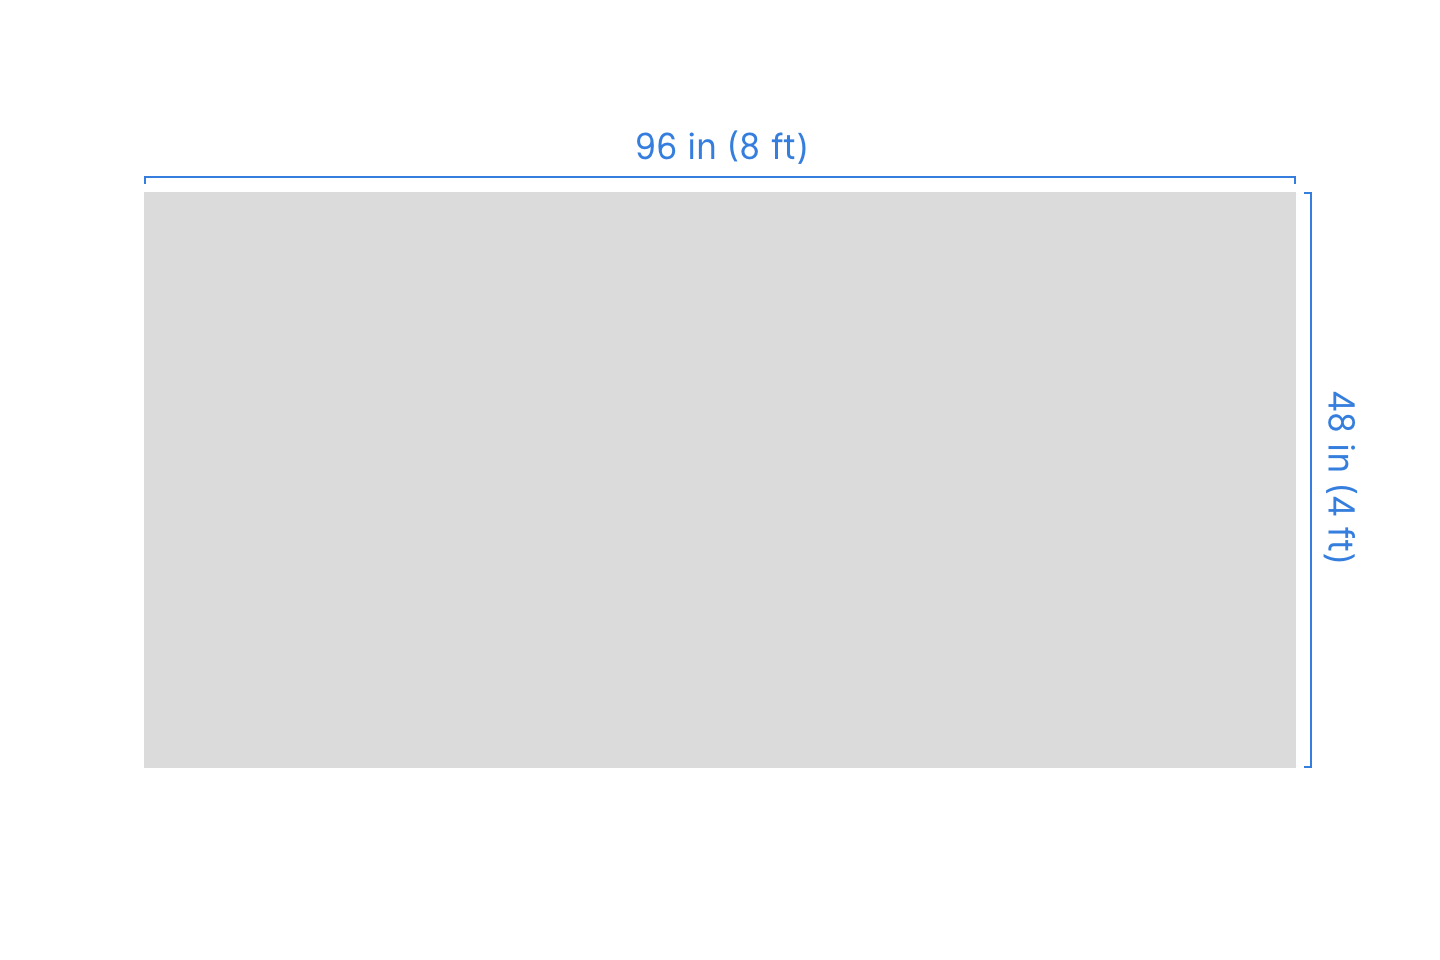
When having the wood cut into strips, you should factor in the width of the blade. To be safe, I had the folks at Pine Cone cut my piece into four 11¾ inch by 96 inch strips. This width of the strips will be the depth of the bookcase when completed.
Step 2: make final cuts
Each of these four strips will make one horizontal shelf and two vertical supports that attach to the shelf below. Note that the supports attached to the bottom most shelf will be half height (7½ inch) and will act as feet.
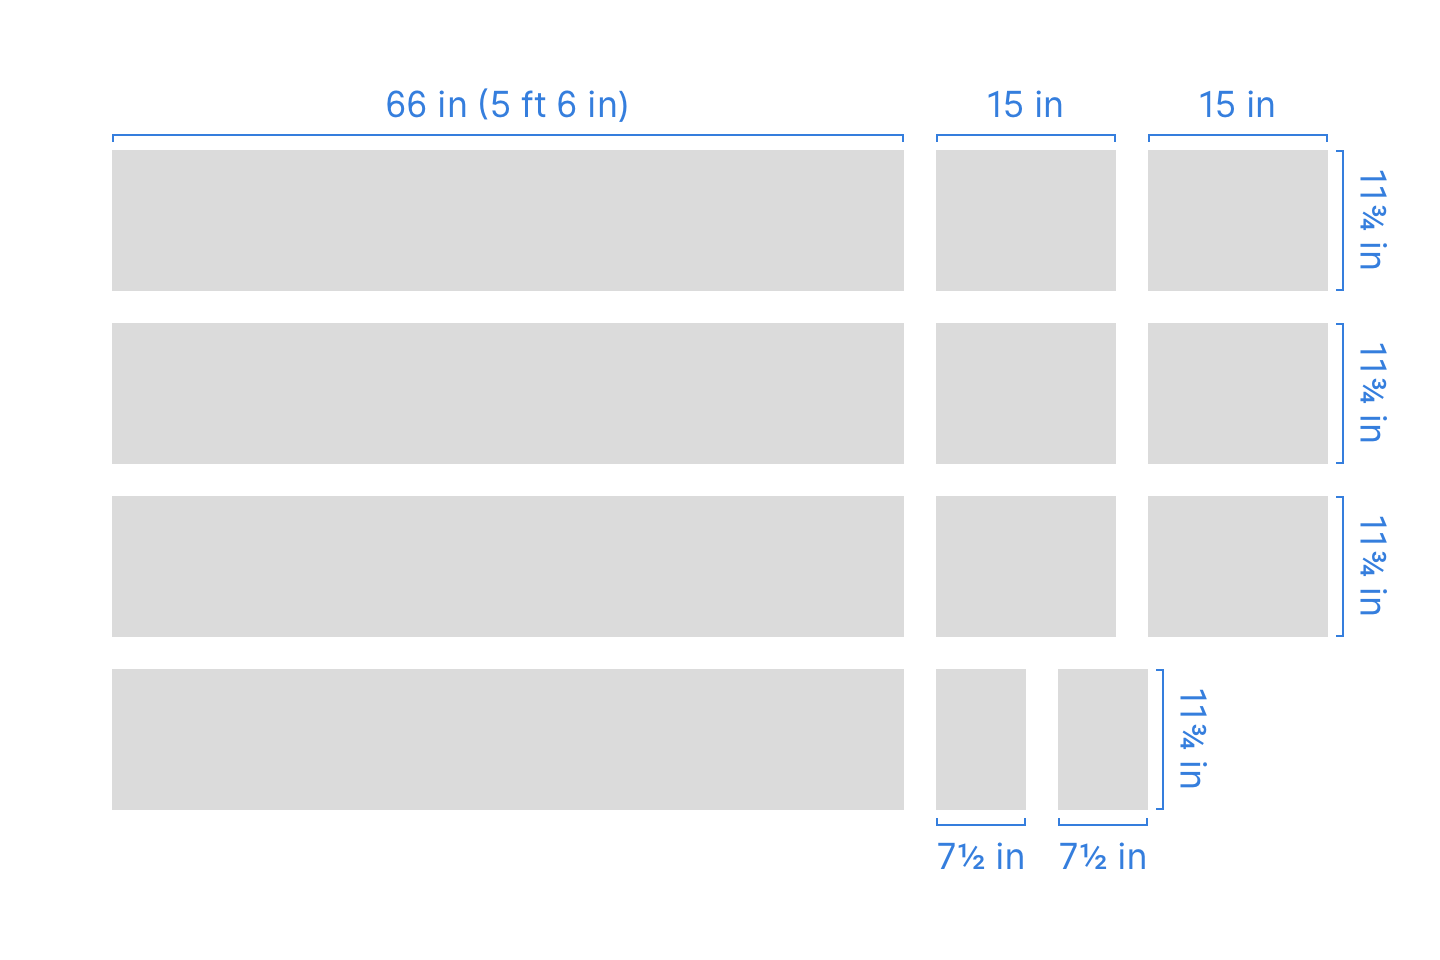
You can ask your lumberyard to make these cuts as well, but I chose to do them myself using a circular saw to get some practice. Again, the blade will take off some length. So, make sure that your final pieces are uniform.
I learned how to use a circular saw and speed square from the Home Made Modern and I Like To Make Stuff YouTube channels. Please use caution when using saws as they can be dangerous if used incorrectly.
After making your cuts you should decide if you want to treat your wood. An oil, polyurethane or other sealer is recommended to waterproof the wood and protect it from stains. I decided to leave mine untreated as I like the natural texture and look of the wood.
Step 3: build vertical modules
This is my favorite step of the process since we can start to see the bookcase coming together.
We’ll first be building six vertical supports, each one comprising one 15 inch by 11¾ inch piece of plywood, eight IKEA EKBY STÖDIS shelf brackets, eight 1 inch screws and eight ⅝ inch screws. I found that the brackets were at a less than 90° angle, but don’t let that concern you as they will later open up a bit when we screw the whole bookcase together.
You can drill pilot holes before screwing the brackets into the wood if you like. I chose not to because I found that the hollow ends of the brackets hid any mess left behind by the screws.
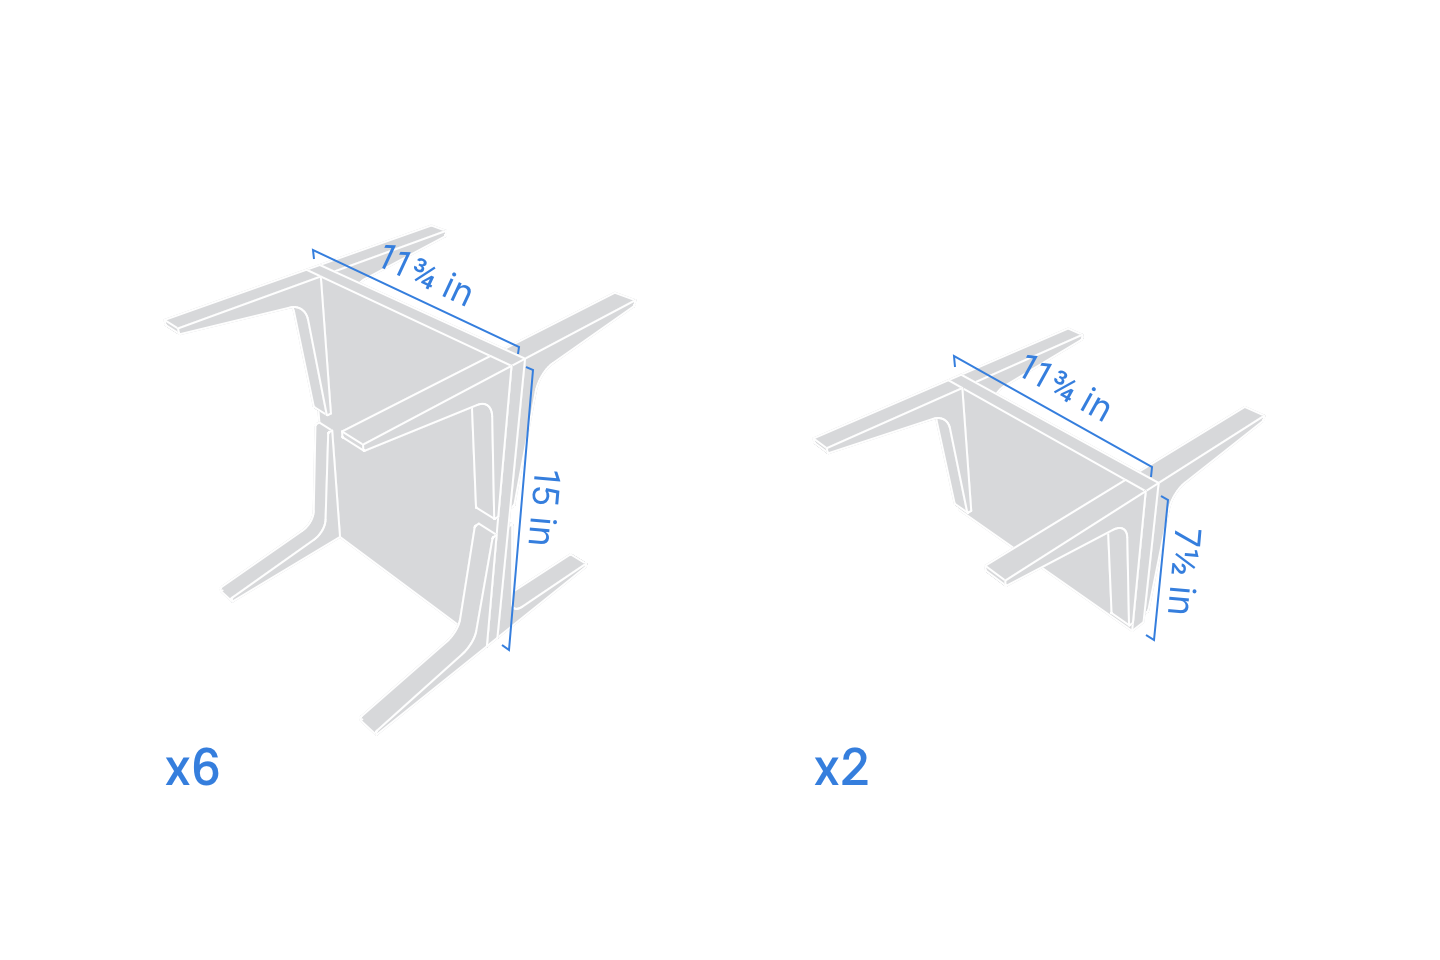
After building the six vertical supports, we’ll build the two feet. Each foot requires one 7½ inch by 11¾ inch piece of plywood, four IKEA EKBY STÖDIS shelf brackets, four 1 inch screws and four ⅝ inch screws.
Step 4: final assembly
This is the fun part. We’ll construct the bookcase layer by layer. I started from the top and worked my way down, but either direction should be fine.

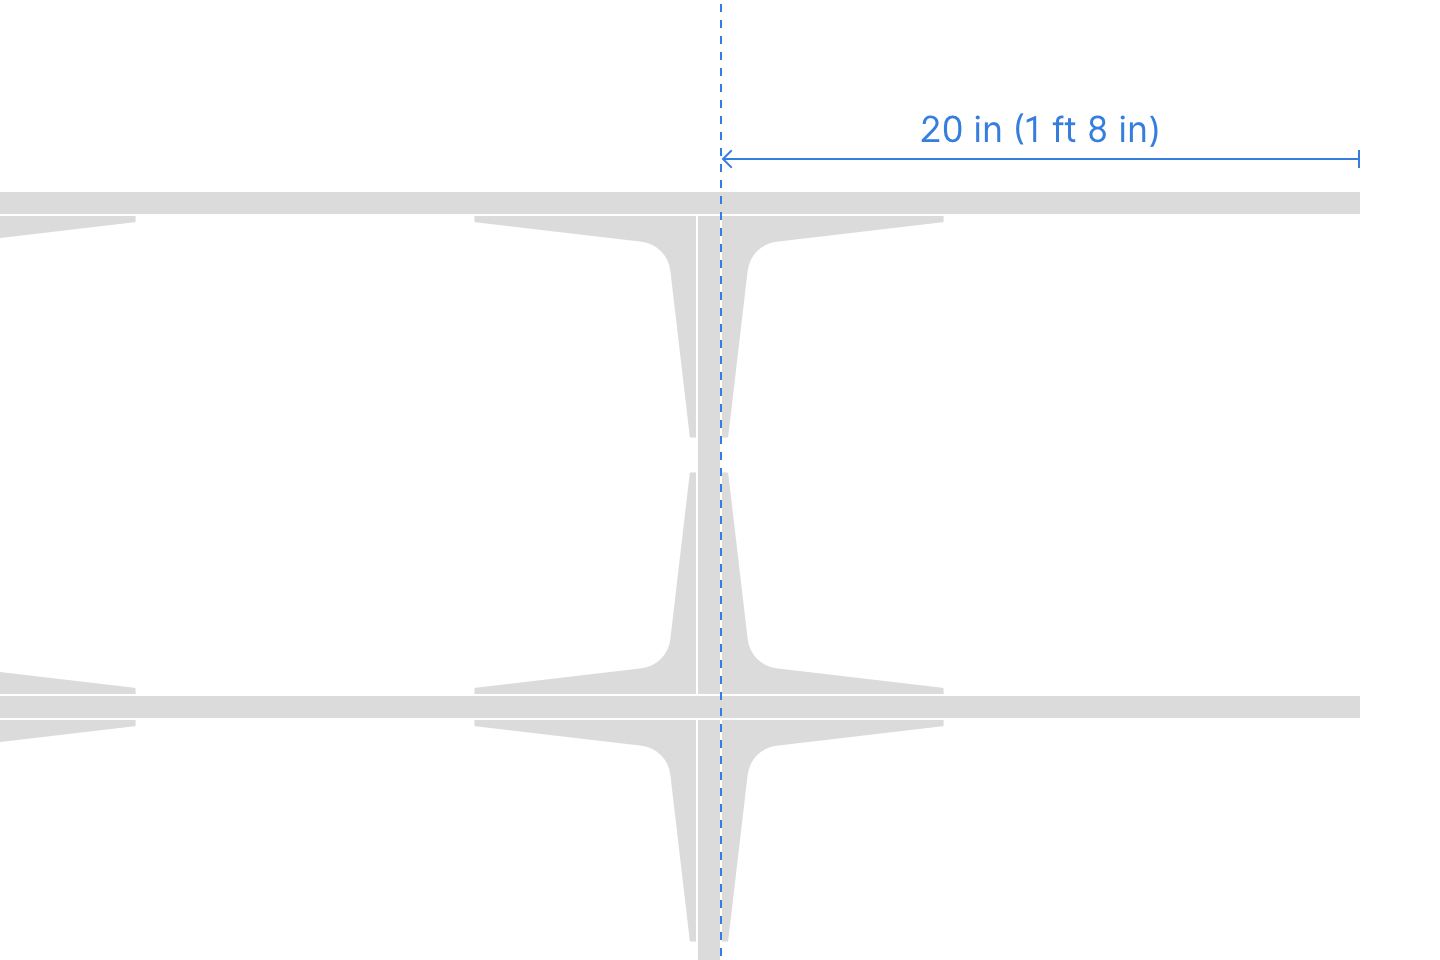
I positioned each vertical support so that the vertical piece of wood is 20 inches in from the edge of the horizontal shelf. I found this measurement is not only an easy, round number, but also leads to a strong and visually balanced structure.
Alternate configurations
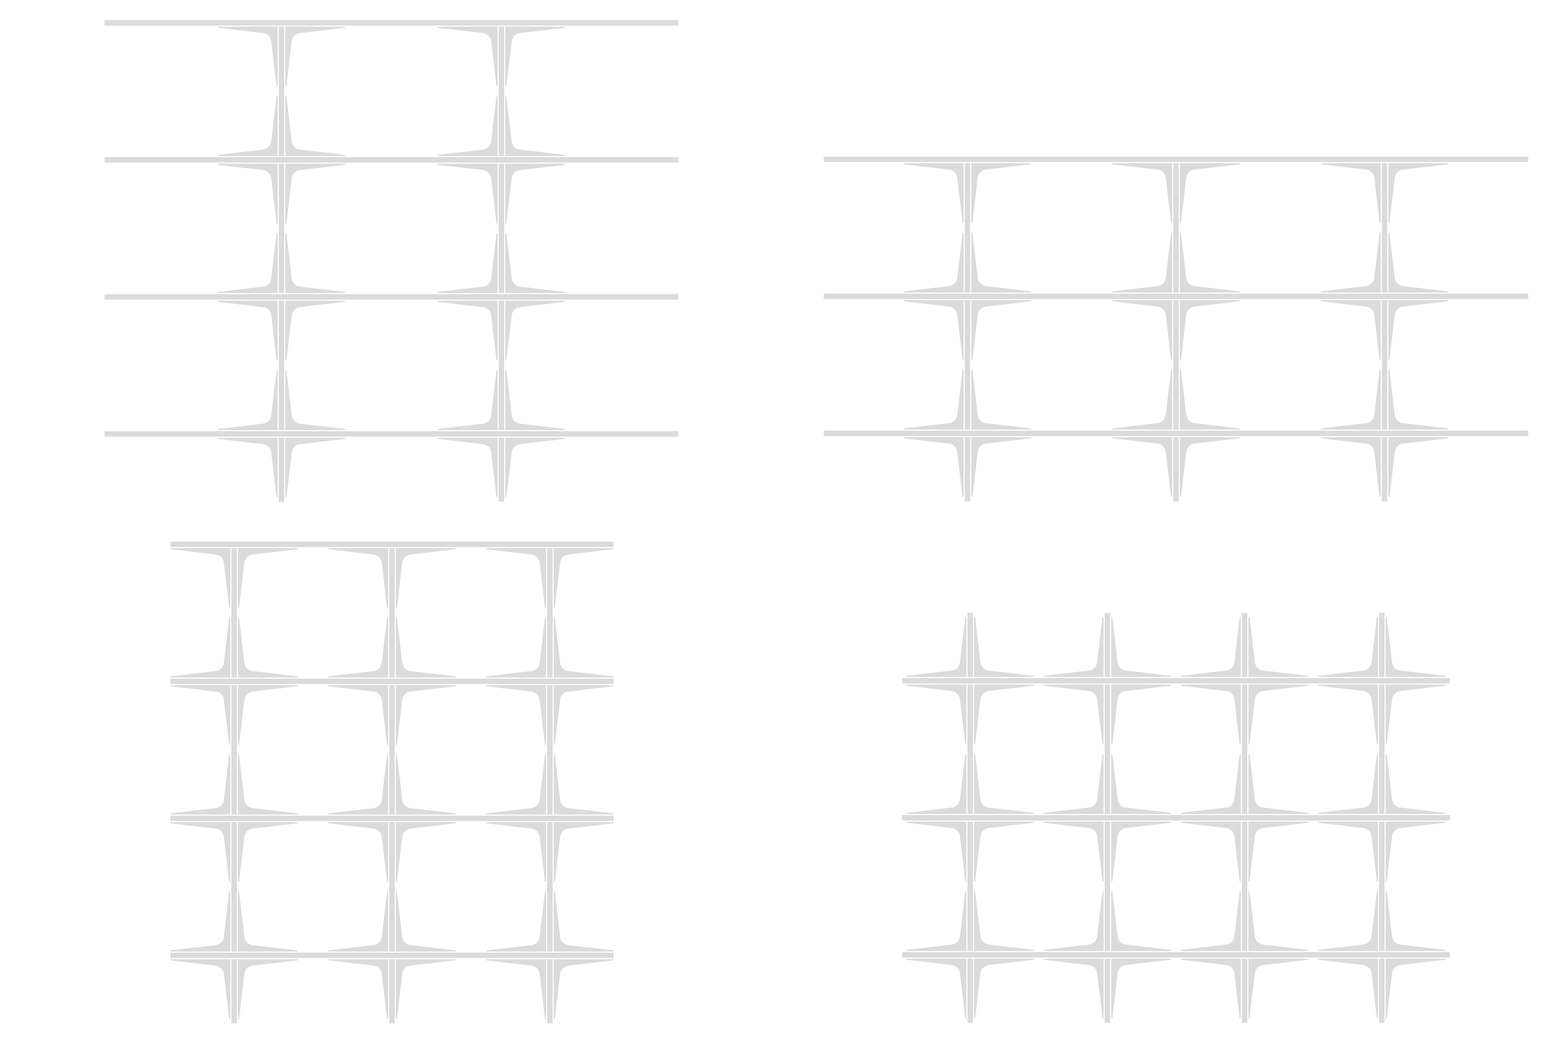
My bookcase is just one example of what you can build with plywood and shelf brackets. Following this formula, you can build many different configurations of bookcases.
Final thoughts
This was my first time designing and building furniture and it was a blast. I learned how to efficiently plan out a project, how to order and pickup lumber from a lumberyard and how to use a circular saw. My hope is that this post inspires you to go out and build something!
